 Save
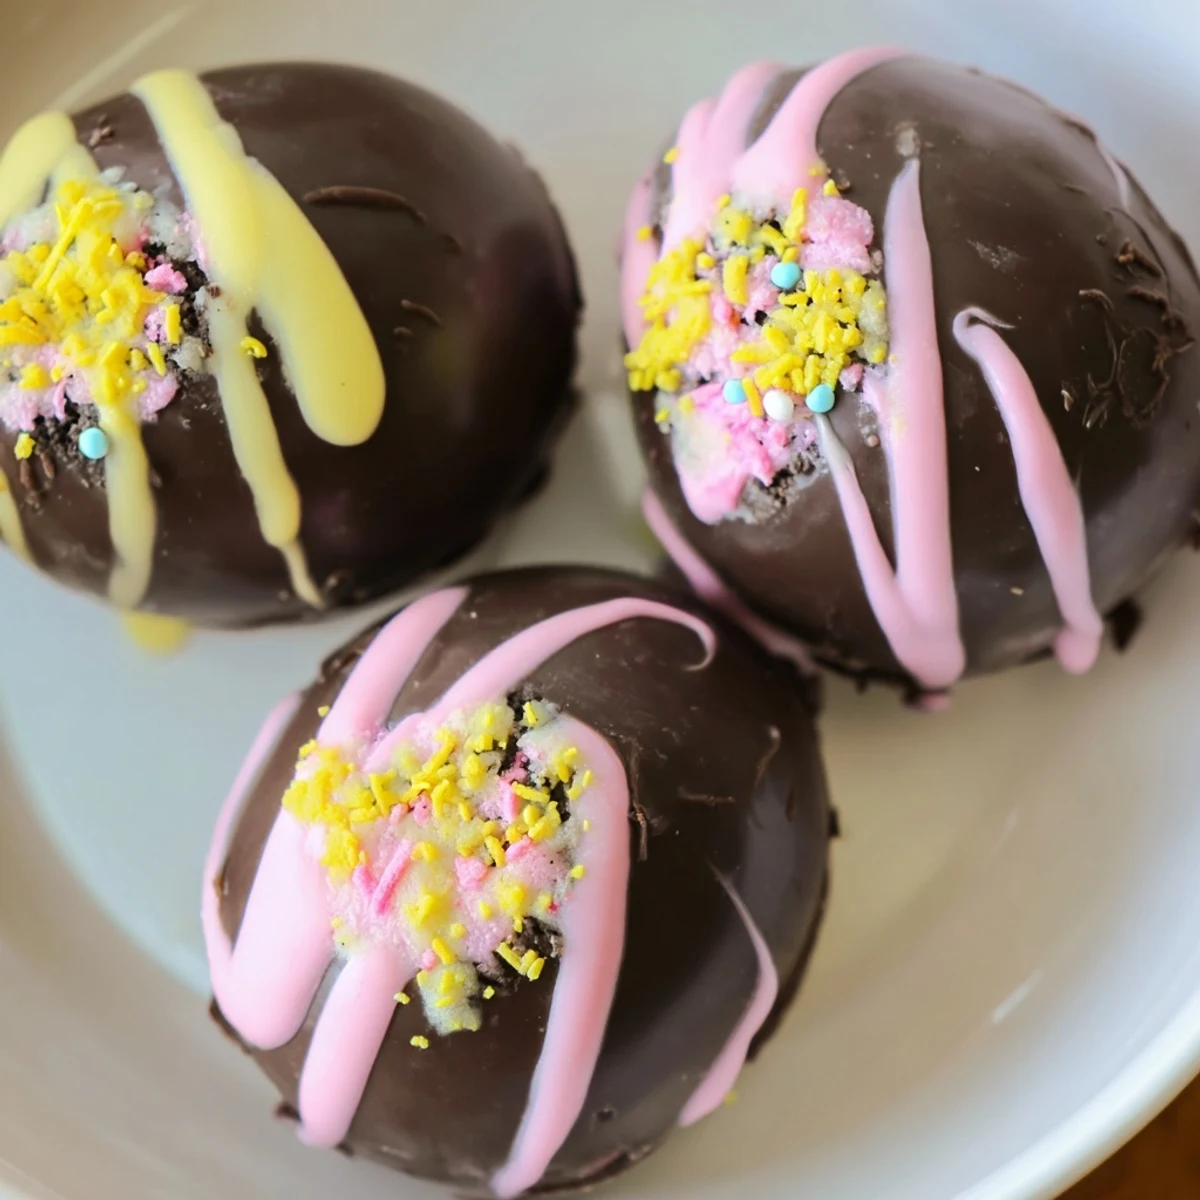
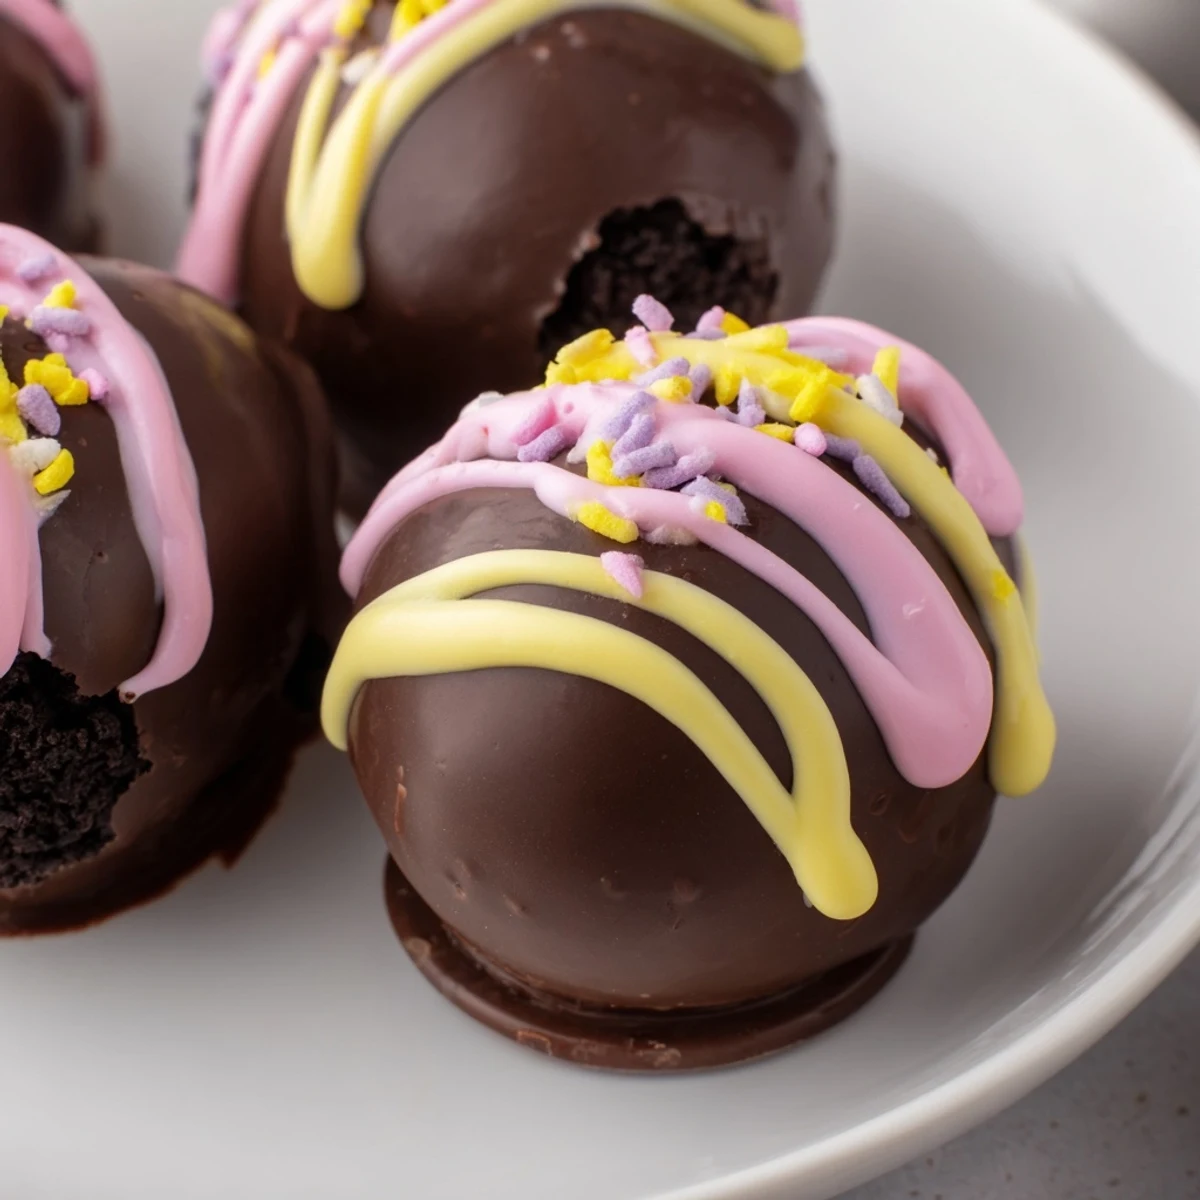
Save These delightful egg-shaped sweets combine the classic crunch of Oreo cookies with creamy cream cheese, all coated in smooth melted chocolate. Perfect for spring celebrations, Easter gatherings, or as edible gifts, these no-bake treats come together in just 25 minutes of active prep time. The chilling time ensures firm, easy-to-shape centers that hold their form beautifully when dipped in chocolate.
Kids love helping decorate these with colorful sprinkles, edible glitter, or drizzles of candy melts. The combination of crunchy cookies, smooth cream cheese filling, and crisp chocolate coating creates an irresistible texture. Store them in the refrigerator for up to a week, making them perfect for advance preparation. Pair with coffee or dessert wine for an elegant finish to any spring meal.
Last Easter, my kitchen looked like a pastel explosion. I had three kids, six bowls of colored candy melts, and Oreo crumbs in places I am still finding. Something about watching them carefully paint zigzags on tiny chocolate eggs made all the mess worth it.
My sister in law asked for the recipe after popping three at our Sunday brunch. She claimed she was just quality testing for Easter, but I saw her sneak another two into her purse on the way out.
Ingredients
- Oreo cookies: One standard package gives you exactly the right ratio of cookie to cream. I have tried store brands and they just do not crush the same way.
- Cream cheese: Must be fully softened or you will end up with lumpy dough. Thirty minutes on the counter does the trick.
- Semisweet or white chocolate: Chop bars into uniform pieces for melting. Chips work but take longer to get silky smooth.
- Candy melts: These are optional but they turn plain chocolate eggs into something festive. Wilton melts are the most reliable for vibrant colors.
Instructions
- Prepare your workspace:
- Line a baking sheet with parchment paper. Clear some counter space. You will need room for the messy part.
- Crush the cookies:
- Pulse whole Oreos in a food processor until they look like fine sand. Do not remove the filling first. That sweet cream is what holds everything together.
- Make the dough:
- Add softened cream cheese to the crumbs. Blend until the mixture pulls away from the sides and forms a smooth, pliable dough.
- Shape into eggs:
- Scoop tablespoon sized portions and roll them between your palms. Gently taper the ends to form an egg shape. Place on the prepared sheet.
- Chill thoroughly:
- Freeze for 30 minutes or until firm to the touch. Warm dough will slide right off your fork into the melted chocolate.
- Melt the chocolate:
- Microwave in 20 second bursts, stirring between each. Stop when it is glossy and fluid. Overheated chocolate seizes and becomes unusable.
- Dip and decorate:
- Drop each chilled egg into the chocolate, lift with a fork, tap against the bowl edge to remove excess. Add sprinkles or drizzles immediately before the coating sets.
- Set completely:
- Refrigerate for at least 15 minutes until the chocolate is firm. These taste best cold but can sit at room temperature for serving.
 Save
Save My four year old ate more sprinkles off the floor than made it onto the eggs. The dog had a very colorful day.
Making Them Ahead
You can form the egg shapes up to three days before dipping. Store them in the freezer layered between parchment paper. Dip and decorate the day before serving for the freshest appearance.
Flavor Variations
Golden Oreos create a vanilla base that pairs beautifully with dark chocolate. Peanut butter Oreos with milk chocolate coating taste like a filled candy bar. Mint Oreos disappear fast in my house during the holidays.
Storage Tips
These keep perfectly in an airtight container for a week in the refrigerator. The texture actually improves after a day as the flavors meld. Layer between wax paper to prevent sticking.
- Hide them in the back of the fridge if you want any left for the actual event
- Bring to room temperature 20 minutes before serving for the creamiest texture
- Package in cellophane bags with ribbon for instant edible gifts
 Save
Save Someone always asks if you can make these year round. Absolutely, just swap the egg shape for rounds and call them truffles.
Recipe FAQs
- → How long do Oreo balls need to chill before dipping?
-
Freeze the shaped Oreo balls for 30 minutes until firm. This ensures they hold their shape when dipped in warm melted chocolate and prevents the filling from becoming too soft during the coating process.
- → Can I make these Oreo balls ahead of time?
-
Yes, these store beautifully in an airtight container in the refrigerator for up to one week. You can also freeze the uncoated balls for up to three months, then thaw and dip in chocolate when ready to serve.
- → What type of chocolate works best for coating?
-
Semi-sweet or white chocolate chips work equally well. For the smoothest coating, chop chocolate bars into uniform pieces before melting. You can also use candy melts specifically designed for dipping, which set faster and hold their shape well in warm weather.
- → Why is my chocolate coating cracking?
-
Cracking usually occurs when the cold balls cause the chocolate to set too quickly. Let the chilled balls sit at room temperature for 5-10 minutes before dipping, and ensure your chocolate isn't too hot—ideally it should be around 90°F for proper coating consistency.
- → Can I use different cookie varieties?
-
Absolutely! Golden Oreos create a vanilla-based treat, while Mint Oreos add refreshing flavor. You can also use flavored cream cheese or mix in extract like peppermint or almond for unique variations tailored to your taste preferences.
- → What's the best way to decorate these Easter egg balls?
-
While the chocolate coating is still wet, sprinkle with colored sugars, edible glitter, or pastel sprinkles. You can also drizzle with melted candy melts in spring colors or pipe simple designs using a small zip-top bag with the corner snipped off.
