 Save
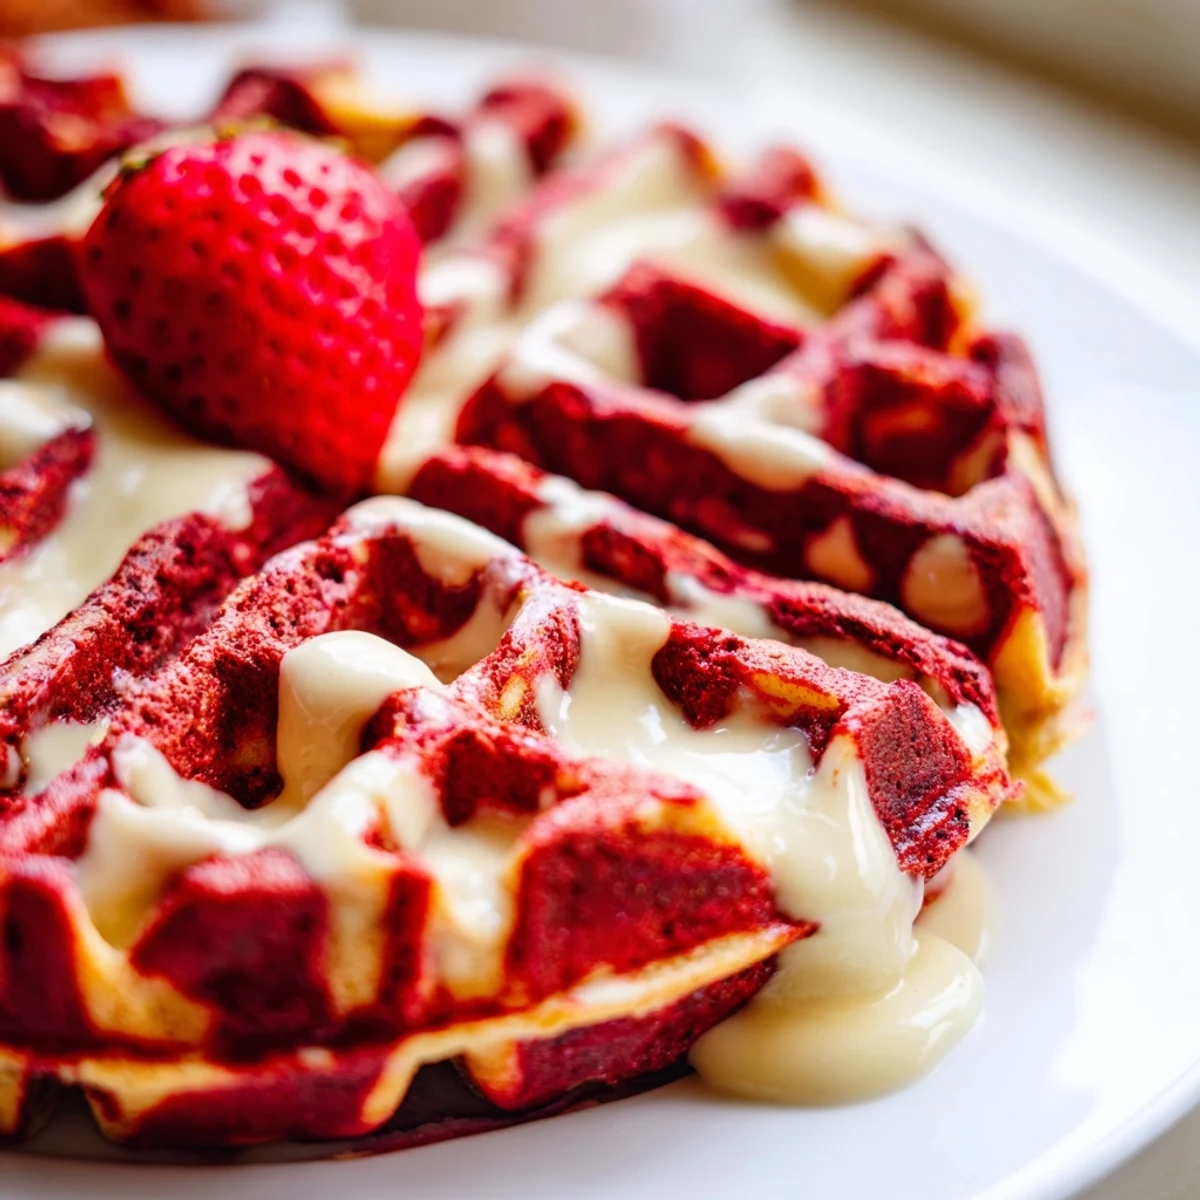
Save Create show-stopping waffles by swirling rich red velvet batter with classic vanilla for a stunning marbled presentation. These breakfast treats combine cocoa's depth with buttermilk's tang, resulting in crisp edges and tender interiors. The signature red hue makes them perfect for holidays, Valentine's Day, or any special weekend morning.
The technique involves preparing two batters—one enhanced with cocoa powder and red food coloring—then dolloping them alternately onto a hot waffle iron. A quick swirl with a chopstick creates the signature marble effect before cooking to golden perfection.
Top these beauties with cream cheese glaze for the ultimate red velvet experience, or keep it simple with maple syrup and fresh berries. The buttermilk ensures a fluffy texture while the cocoa adds subtle chocolate complexity that balances the sweetness perfectly.
Last Sunday, I stood in my kitchen half-asleep, watching red food coloring drip into pancake batter like something from a science experiment. My daughter had begged for red velvet anything after seeing it on a baking show, and waffles were the compromise between her enthusiasm and my morning patience. The first batch came out a shocking pink, but by the third waffle, we had this gorgeous marble situation happening and she was already planning next weekend's flavor variation.
My neighbor smelled them cooking through our open kitchen window and actually texted me asking what bakery I'd visited. When I brought over a plate, her kids went absolutely silent, which is pretty much the highest compliment you can get from anyone under ten. Now every time I see red food coloring in the baking aisle, I grab another bottle because these have become our go-to for sleepover mornings.
Ingredients
- 2 cups all-purpose flour: The foundation that gives these waffles their classic fluffy interior and crisp exterior
- 2 tbsp granulated sugar: Just enough sweetness to balance the tang of buttermilk without making them dessert-like
- 2 tsp baking powder: Essential for that lift that makes waffles light instead of dense
- 1/2 tsp baking soda: Works with the buttermilk to create extra height and tenderness
- 1/4 tsp salt: Keeps everything from tasting flat and highlights the vanilla notes
- 1 3/4 cups buttermilk: Room temperature is key here for even mixing and that subtle tangy flavor
- 2 large eggs: Room temperature eggs blend more smoothly into the batter
- 4 tbsp unsalted butter: Melted and slightly cooled so it does not scramble your eggs when mixed
- 1 tsp vanilla extract: The warm backbone that complements both the chocolate and vanilla elements
- 2 tbsp unsweetened cocoa powder: Deepens the red velvet flavor without making it too chocolate-forward
- 1 tbsp red food coloring: Liquid or gel both work but gel gives a more intense color with less liquid
Instructions
- Mix the dry foundation:
- Whisk together flour, sugar, baking powder, baking soda, and salt in a large bowl until everything is evenly distributed and no clumps remain
- Combine the wet ingredients:
- In another bowl, whisk buttermilk, eggs, melted butter, and vanilla extract until completely smooth and the mixture has a uniform pale yellow color
- Bring it together gently:
- Pour the wet mixture into the dry ingredients and fold just until combined, leaving some small lumps because overmixing makes tough waffles
- Split and color:
- Divide the batter evenly between two bowls, then whisk cocoa powder and red food coloring into one until it is a vibrant red and completely smooth
- Heat your iron:
- Preheat your waffle iron and give it a quick coating of oil or nonstick spray so nothing sticks later
- Create the marble:
- Drop alternating spoonfuls of red and vanilla batter onto the hot iron, then use a chopstick or butter knife to gently swirl them together once or twice
- Cook to perfection:
- Close the lid and cook for 3 to 5 minutes until the waffles are golden brown and crisp on the outside
- Serve them up:
- Top with cream cheese glaze, maple syrup, or fresh fruit while still warm for the best experience
 Save
Save My husband, who claims he does not like red velvet anything, ate three of these standing at the counter while I was still cooking the last batch. Now he requests them whenever we have people over for brunch because watching guests discover the marbled pattern is basically free entertainment.
Getting The Marble Effect Right
The trick is actually not overthinking it. I spent way too much time on my first batch trying to create a perfect spiral pattern, but the prettiest waffles came from just randomly dropping spoonfuls of each batter and giving them one or two quick swipes with a chopstick.
Buttermilk Substitutions
Greek yogurt thinned with a little milk works beautifully if you do not have buttermilk on hand. The texture stays remarkably similar and you still get that slight tang that makes red velvet what it is supposed to be.
Make Ahead And Storage
These actually reheat surprisingly well in the toaster oven, which means I often make a double batch on Sunday and pop them in the toaster throughout the week. The exterior gets crispy again and the marble pattern stays just as pretty as the first day.
- Freeze cooked waffles in a single layer first so they do not stick together
- Reheat at 350°F for about 5 minutes to restore that just-cooked texture
- The cream cheese glaze is best made fresh but keeps in the fridge for up to three days
 Save
Save There is something genuinely joyful about cutting into these and seeing that swirl pattern, like breakfast decided to dress up for a party.
Recipe FAQs
- → What makes these different from regular waffles?
-
The marble technique creates visually stunning waffles by swirling red cocoa-infused batter with classic vanilla batter, giving you both flavors in every bite plus that dramatic red and white pattern.
- → Can I make the batter ahead of time?
-
Yes, prepare both batters separately and refrigerate overnight. Let them come to room temperature for 15 minutes before cooking as cold batter may not spread properly in the waffle iron.
- → What's the best way to achieve the marble effect?
-
Drop alternating spoonfuls of red and vanilla batters onto the hot iron without mixing them first. Use a chopstick or butter knife to make 2-3 gentle swirls—over-swirling will blend the colors completely.
- → Can I use natural food coloring?
-
Beet juice or pomegranate juice can replace artificial red food coloring, though the hue will be more subtle. You may need to reduce other liquids slightly to maintain batter consistency.
- → How do I store and reheat leftovers?
-
Cool completely, then freeze in a single layer before transferring to a freezer bag. Reheat in a toaster or 350°F oven for 5 minutes to restore crispiness—microwaving will make them soggy.
- → What toppings work best?
-
Cream cheese glaze is the classic choice, complementing the tangy buttermilk and cocoa. Whipped cream, fresh strawberries, or a dusting of powdered sugar also work beautifully.
