 Save
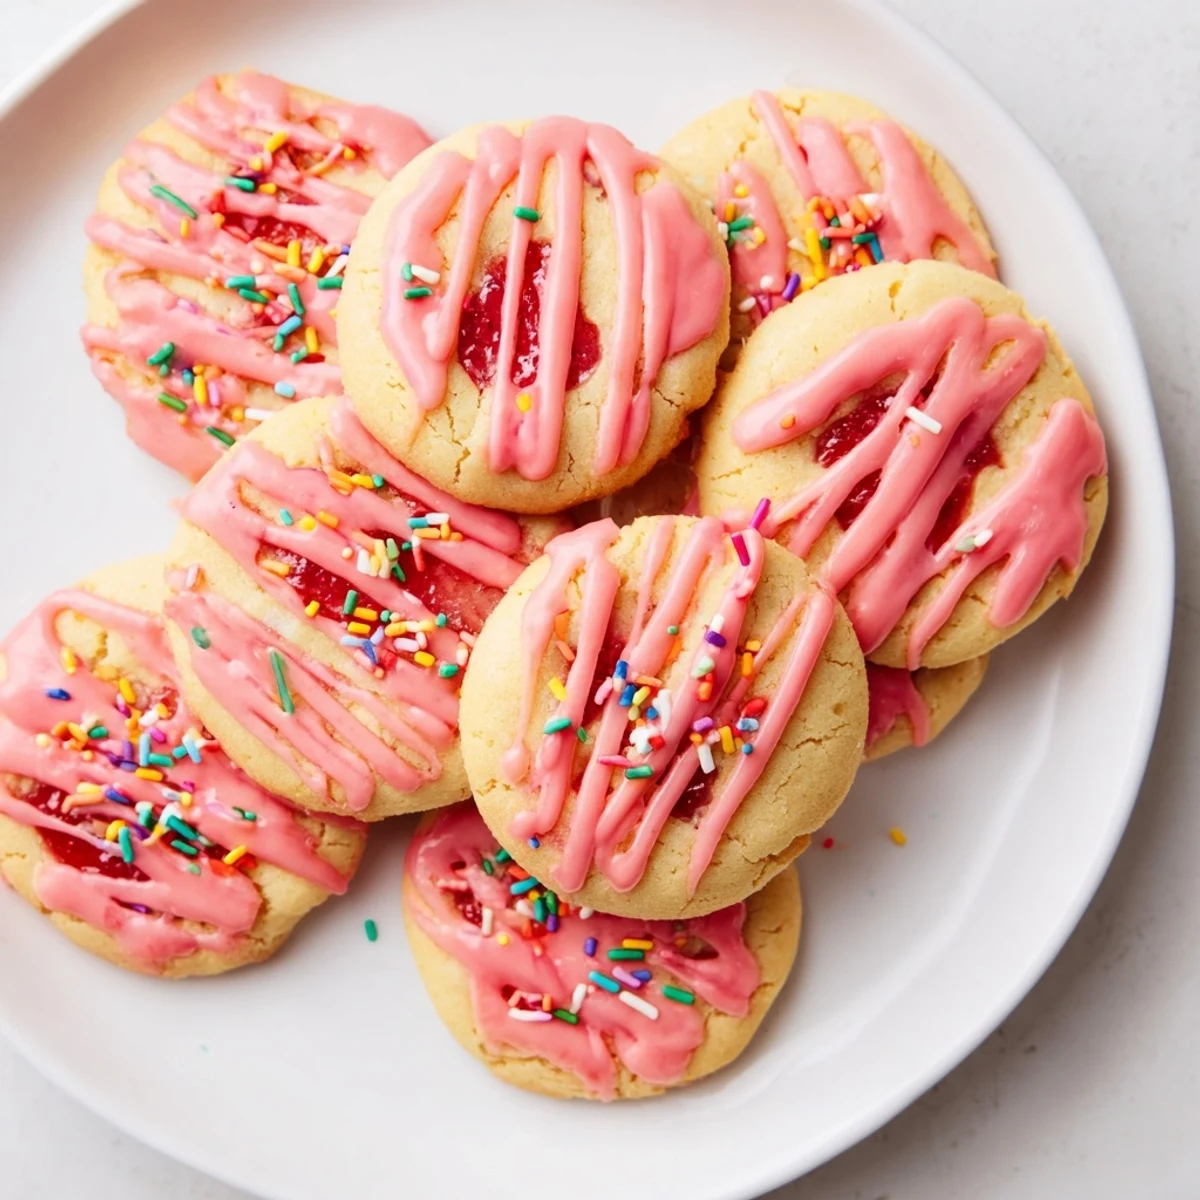
Save These soft, buttery cookies capture the nostalgic essence of strawberry Pop-Tarts in homemade form. Each tender cookie is hand-filled with sweet strawberry jam, baked until golden, then finished with a vibrant pink vanilla glaze and cheerful sprinkles.
The dough comes together quickly with pantry staples, while the jam-filled centers create that beloved fruit-filled experience. The optional pink food coloring gives them that instantly recognizable appearance, though they taste just as delicious without it.
Perfect for bake sales, lunchbox treats, or whenever you want a playful dessert that feels like childhood. The cookie edges stay slightly crisp while centers remain tender, and the glaze adds just the right amount of sweetness.
My sister and I used to fight over the last frosted strawberry Pop-Tart every Saturday morning, so when I stumbled on the idea of folding that toaster pastry magic into a soft cookie, I knew shed lose her mind. The first batch disappeared within an hour, still slightly warm, glaze smeared across our fingers. These cookies capture everything I loved about those childhood mornings but wrapped up in a buttery, jammy, sprinkle covered bite that feels just a little more grown up.
I brought a tin of these to a neighborhood potluck last summer and ended up writing the recipe on three different napkins before the night was over. One neighbor, a retired baker, pulled me aside and said the glaze ratio was spot on, which honestly made my whole week.
Ingredients
- All purpose flour (2 1/4 cups, 280 g): Gives the cookie enough structure to hold the jam without turning cakey.
- Baking powder (1/2 teaspoon): A gentle lift so the cookies stay soft rather than spreading flat.
- Salt (1/2 teaspoon): Balances the sweetness and makes the strawberry flavor pop.
- Unsalted butter, softened (3/4 cup, 170 g): Room temperature butter creams properly and creates that tender crumb.
- Granulated sugar (3/4 cup, 150 g): Sweetness and crisp edge contribution.
- Light brown sugar (1/4 cup, 50 g): A touch of molasses depth keeps the flavor rounded.
- Large eggs (2): Binds everything together and adds richness.
- Vanilla extract (2 teaspoons): Don't skimp here, good vanilla elevates the entire cookie.
- Strawberry jam or preserves (3/4 cup, 210 g): Use a quality preserves brand with real fruit pieces for the best filling.
- Powdered sugar (1 cup, 120 g): The glaze base that sets into a sweet, slightly crackly topping.
- Milk (2 tablespoons): Thins the glaze to the perfect drizzling consistency.
- Vanilla extract for glaze (1/2 teaspoon): Rounds out the powdered sugar flavor.
- Pink or red food coloring (optional): A drop or two gives that signature Pop-Tart look.
- Sprinkles: Nonpareils or rainbow jimmies both work beautifully.
Instructions
- Preheat and prep:
- Set your oven to 350F (175C) and line two baking sheets with parchment paper so nothing sticks.
- Whisk the dry:
- In a medium bowl, whisk together the flour, baking powder, and salt until evenly combined.
- Cream the butter and sugars:
- Beat the softened butter, granulated sugar, and brown sugar in a large bowl until the mixture turns pale and fluffy, about two to three minutes.
- Add eggs and vanilla:
- Drop in one egg at a time, beating after each, then pour in the vanilla and mix until everything looks silky.
- Bring the dough together:
- Gradually add the dry ingredients to the wet, mixing just until the last streak of flour disappears.
- Stuff and seal:
- Scoop two tablespoon portions, flatten each into a disc in your palm, spoon one teaspoon of jam into the center, then fold the edges up and pinch to seal before rolling gently into a ball.
- Arrange on sheets:
- Place the filled dough balls on your prepared sheets about two inches apart so they have room to spread.
- Bake:
- Bake for eleven to thirteen minutes until the edges look set but the centers still seem slightly soft and pale.
- Cool:
- Let the cookies rest on the baking sheet for five minutes, then move them to a wire rack to cool completely.
- Glaze and sprinkle:
- Whisk the powdered sugar, milk, vanilla, and a drop of food coloring until smooth, drizzle over the cooled cookies, and scatter sprinkles on top before the glaze sets.
 Save
Save The moment my sister bit into one and immediately closed her eyes with a huge grin, I knew this recipe was permanently entering the family rotation. Food that makes people grin like that is worth every sprinkle on the counter.
Jam Swaps and Flavor Ideas
Raspberry preserves are my second favorite filling here because the tartness cuts through the sweet glaze beautifully. Blueberry jam works too, and apricot adds a sunny brightness that feels completely different but equally delicious.
Storage That Keeps Them Soft
An airtight container at room temperature keeps these cookies soft for up to four days, though they rarely last that long in my kitchen. If you stack them, place a sheet of parchment between layers so the glaze does not smudge.
Getting the Glaze Just Right
The glaze should be thick enough to coat the back of a spoon but thin enough to drip slowly when you lift it. Add milk a tiny splash at a time because you can always thin it more but thickening it back up is frustrating.
- Test the consistency on one cookie first before glazing the whole batch.
- Apply sprinkles immediately while the glaze is still wet or they will bounce right off.
- A squeeze bottle gives you more control than a spoon for even drizzling.
 Save
Save Whether you make these for a birthday, a bake sale, or just a rainy Tuesday that needs brightening, they carry that rare magic of turning simple ingredients into pure joy. Share them generously and watch people light up.
Recipe FAQs
- → Can I use different jam flavors?
-
Absolutely! Raspberry, blueberry, apricot, or even mixed berry jam work beautifully. Choose your favorite preserves or whatever you have in your pantry.
- → How do I prevent the jam from leaking during baking?
-
Make sure to pinch the dough tightly around the jam filling and seal completely. Place the sealed seam side down on the baking sheet for extra security.
- → Can I freeze the dough?
-
Yes! Scoop and fill the dough balls, then freeze on a baking sheet before transferring to a freezer bag. Bake from frozen, adding 1-2 minutes to the baking time.
- → Do I need the food coloring?
-
No, the food coloring is purely optional. The glaze tastes delicious plain or you can use natural alternatives like beet juice or strawberry powder for pink color.
- → How should I store these cookies?
-
Keep in an airtight container at room temperature for up to 4 days. Place parchment paper between layers to prevent the glaze from sticking.
- → Can I make these without a mixer?
-
Yes! Use a sturdy whisk and some elbow grease to cream the butter and sugars by hand. The dough will still turn out wonderfully.
