 Save
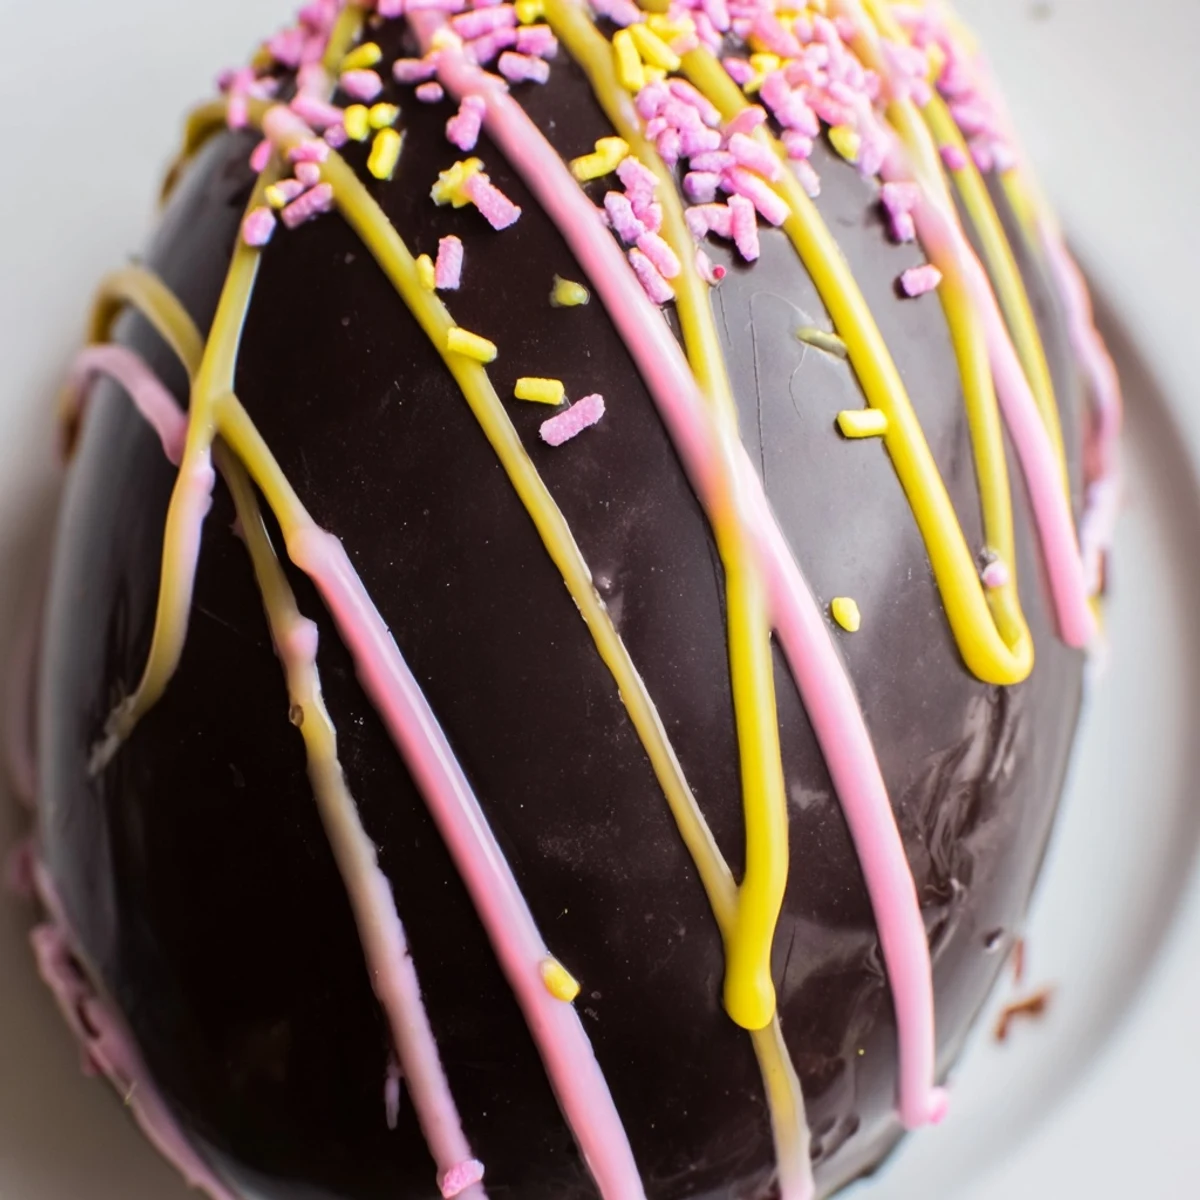
Save These creamy Cool Whip Easter eggs combine a smooth, vanilla-infused filling with rich chocolate coating for a festive holiday treat. The filling blends softened cream cheese, thawed Cool Whip, powdered sugar, and vanilla extract for a light yet indulgent center. After shaping into egg forms and freezing until firm, each piece gets dipped in melted semi-sweet chocolate mixed with coconut oil for a flawless finish.
The preparation is straightforward and perfect for involving children in the kitchen. Kids can help shape the eggs, dip them in chocolate, and decorate with pastel sprinkles or colored candy melts. The chilling time ensures the filling holds its shape during dipping, while the final refrigeration sets the chocolate coating completely.
Store these colorful treats in an airtight container in the refrigerator for up to five days. Consider adding almond or coconut extract for flavor variations. These eggs make excellent additions to Easter baskets, dessert tables, or spring gatherings.
Last Easter my niece discovered she could trick everyone into thinking she was fancy by making these colorful cream filled eggs. We ended up with chocolate on our noses and pastel sprinkles everywhere, but nobody minded because the results were unexpectedly delicious.
I accidentally forgot to chill the filling long enough the first time and ended up with chocolate covered puddles instead of eggs. The kids still ate them with spoons and declared them even better that way, though I learned my lesson about patience.
Ingredients
- 2 cups Cool Whip (thawed): This creates the impossibly light and fluffy texture that makes these eggs feel like eating clouds
- 1/2 cup cream cheese, softened: Room temperature cream cheese blends seamlessly into the Cool Whip without any lumps
- 2 cups powdered sugar: This sweetens and stabilizes the filling so it holds its egg shape after freezing
- 1 teaspoon vanilla extract: Pure vanilla extract makes the creamy center taste homemade rather than processed
- 2 cups semi-sweet chocolate chips: Quality chocolate makes these feel indulgent despite the playful appearance
- 1 tablespoon coconut oil or vegetable oil: The thinned chocolate coats smoothly and sets with a professional looking shine
- Assorted pastel sprinkles: These make the eggs look like something from an artisan chocolate shop
- Colored candy melts: Drizzles of pink yellow and blue chocolate turn these into edible art
Instructions
- Make the creamy filling:
- Beat the softened cream cheese until completely smooth then fold in the Cool Whip powdered sugar and vanilla until everything is combined and fluffy.
- Chill the mixture:
- Place the bowl in the freezer for 20 to 30 minutes until the filling is firm enough to hold its shape when you scoop it.
- Shape the eggs:
- Line a baking sheet with parchment paper then use damp hands to form about 2 tablespoon portions of the cold filling into egg shapes.
- Freeze until solid:
- Freeze the shaped eggs for at least 1 hour until they are completely firm and ready for their chocolate coating.
- Melt the chocolate:
- Microwave the chocolate chips and coconut oil together in 30 second intervals stirring between each until the mixture is glossy and smooth.
- Coat the eggs:
- Dip each frozen egg into the melted chocolate using a fork letting the excess drip off before returning it to the parchment lined sheet.
- Add decorations:
- Immediately top with sprinkles or drizzle with colored candy melts before the chocolate sets so everything sticks.
- Chill until set:
- Refrigerate the eggs for about 30 minutes until the chocolate is completely firm then serve chilled.
 Save
Save My mom now asks for these instead of traditional Easter cake and the kids feel so proud making something that looks like it came from a chocolate shop. They have become our signature holiday dessert.
Making Ahead For Easter Morning
I learned to prepare the filling and shape the eggs up to two days in advance then keep them frozen until ready to dip. This makes Easter morning feel less rushed since the chocolate coating takes just minutes.
Getting Kids Involved Safely
Children can help shape the eggs with damp hands and absolutely love adding the sprinkles and colored drizzles. I handle the melted chocolate part but they take complete ownership of the decorating.
Storing Your Easter Creations
These eggs actually improve after a day in the refrigerator as the flavors meld together beautifully. Keep them in an airtight container between layers of parchment paper to prevent sticking.
- Let the eggs sit at room temperature for about 5 minutes before serving for the best texture
- Package them in cute Easter boxes or clear bags tied with pastel ribbons for gifting
- The sprinkles stay crunchy longer if you add them right before serving rather than storing them
 Save
Save These colorful eggs have become our most requested Easter treat and nobody believes how simple they are to make.
Recipe FAQs
- → Can I make these Cool Whip Easter eggs ahead of time?
-
Yes, these eggs store beautifully in an airtight container in the refrigerator for up to 5 days. You can prepare them several days before your Easter celebration without any loss of quality or texture.
- → What if I don't have Cool Whip?
-
You can substitute homemade stabilized whipped cream or another frozen whipped topping. Just ensure it's thawed and well-drained before mixing with the cream cheese to maintain the proper consistency.
- → Why does the filling need freezing before shaping?
-
Freezing firms up the creamy mixture, making it much easier to shape into neat egg forms without sticking to your hands. This step also helps the eggs maintain their shape during the chocolate dipping process.
- → Can I use white chocolate instead of semi-sweet?
-
Absolutely! White chocolate works wonderfully and creates a beautiful pastel contrast. You can also dye white chocolate with food coloring to create vibrant coated eggs in any color you prefer.
- → How do I prevent the chocolate from seizing?
-
Adding coconut oil to the chocolate chips helps create a smooth, pourable consistency. Microwave in short 30-second intervals, stirring well between each, to prevent overheating which can cause chocolate to seize.
- → What's the best way to dip the eggs without making a mess?
-
Using a fork allows excess chocolate to drip off easily while keeping the egg stable. Work with frozen eggs and tap the fork gently against the bowl edge to remove drips before transferring back to the parchment-lined sheet.
