 Save
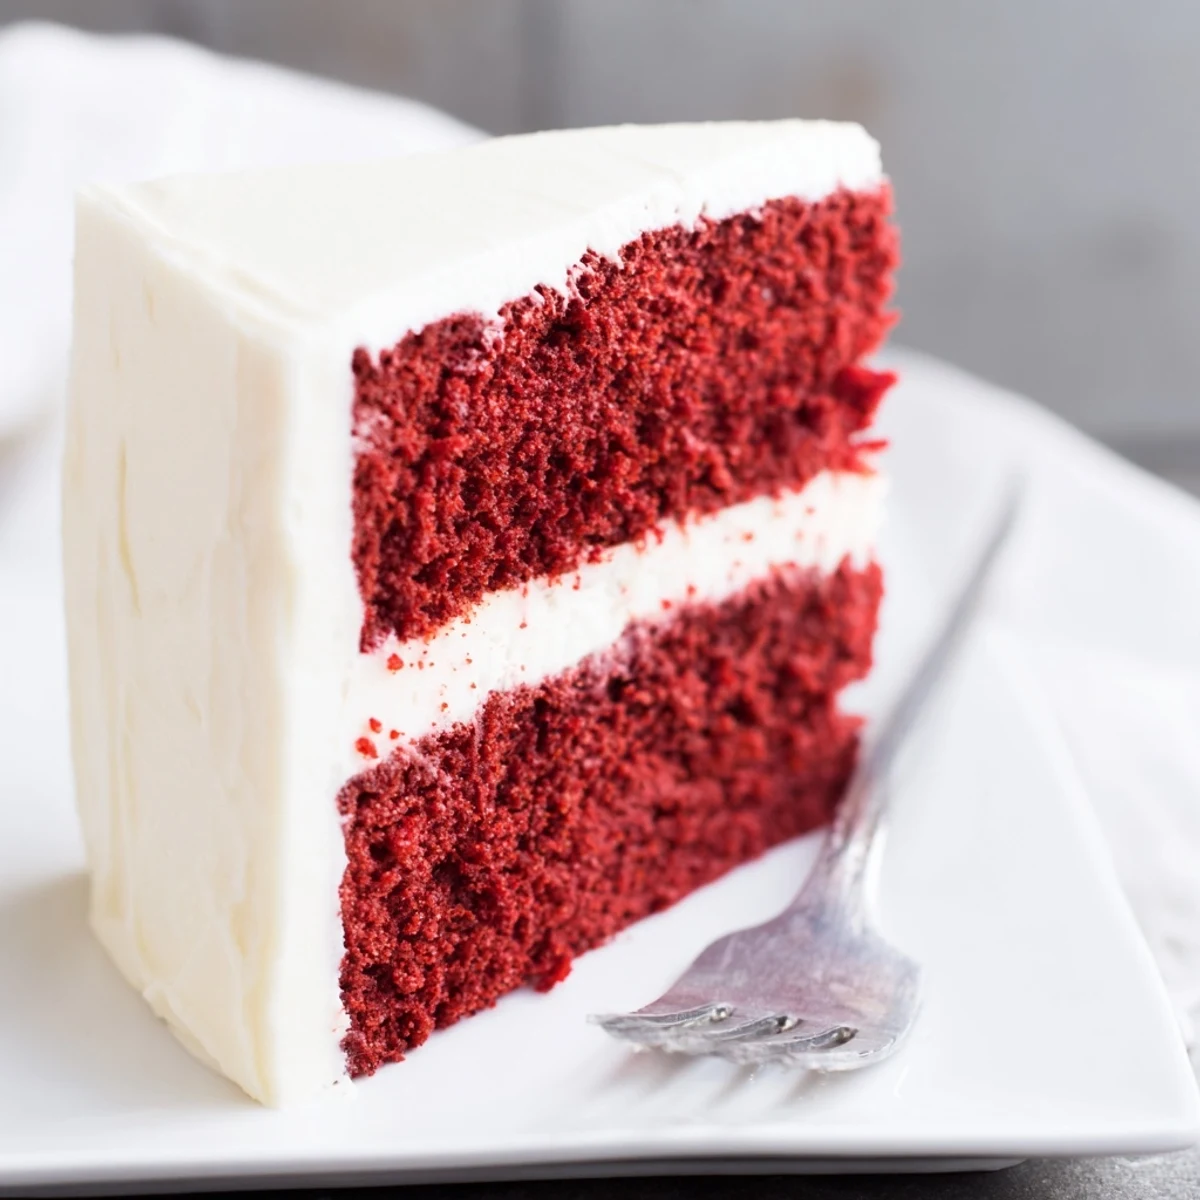
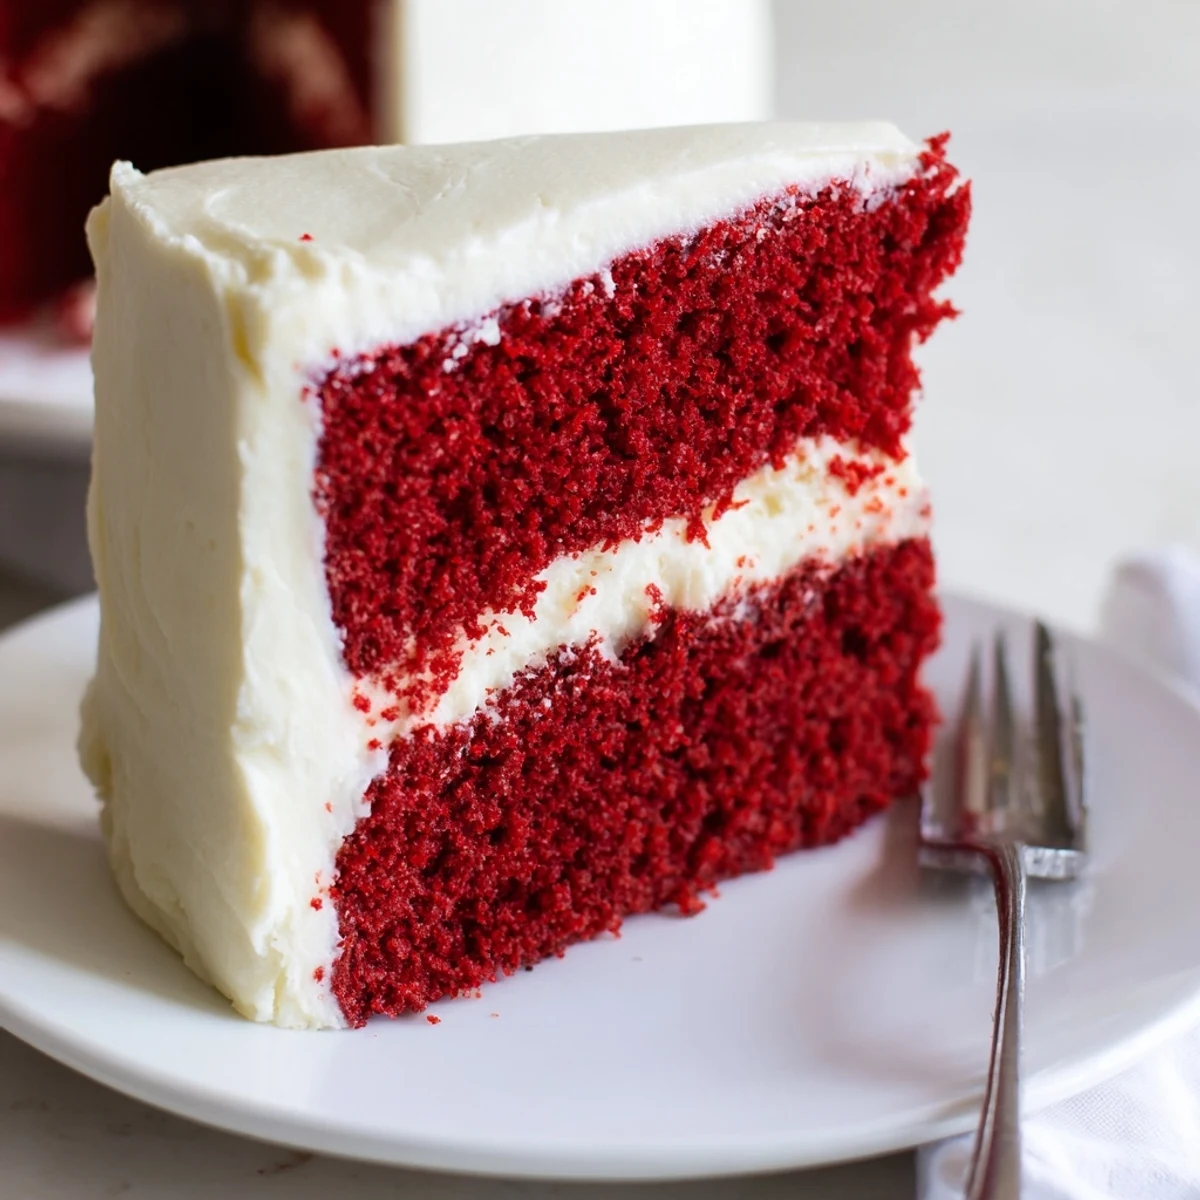
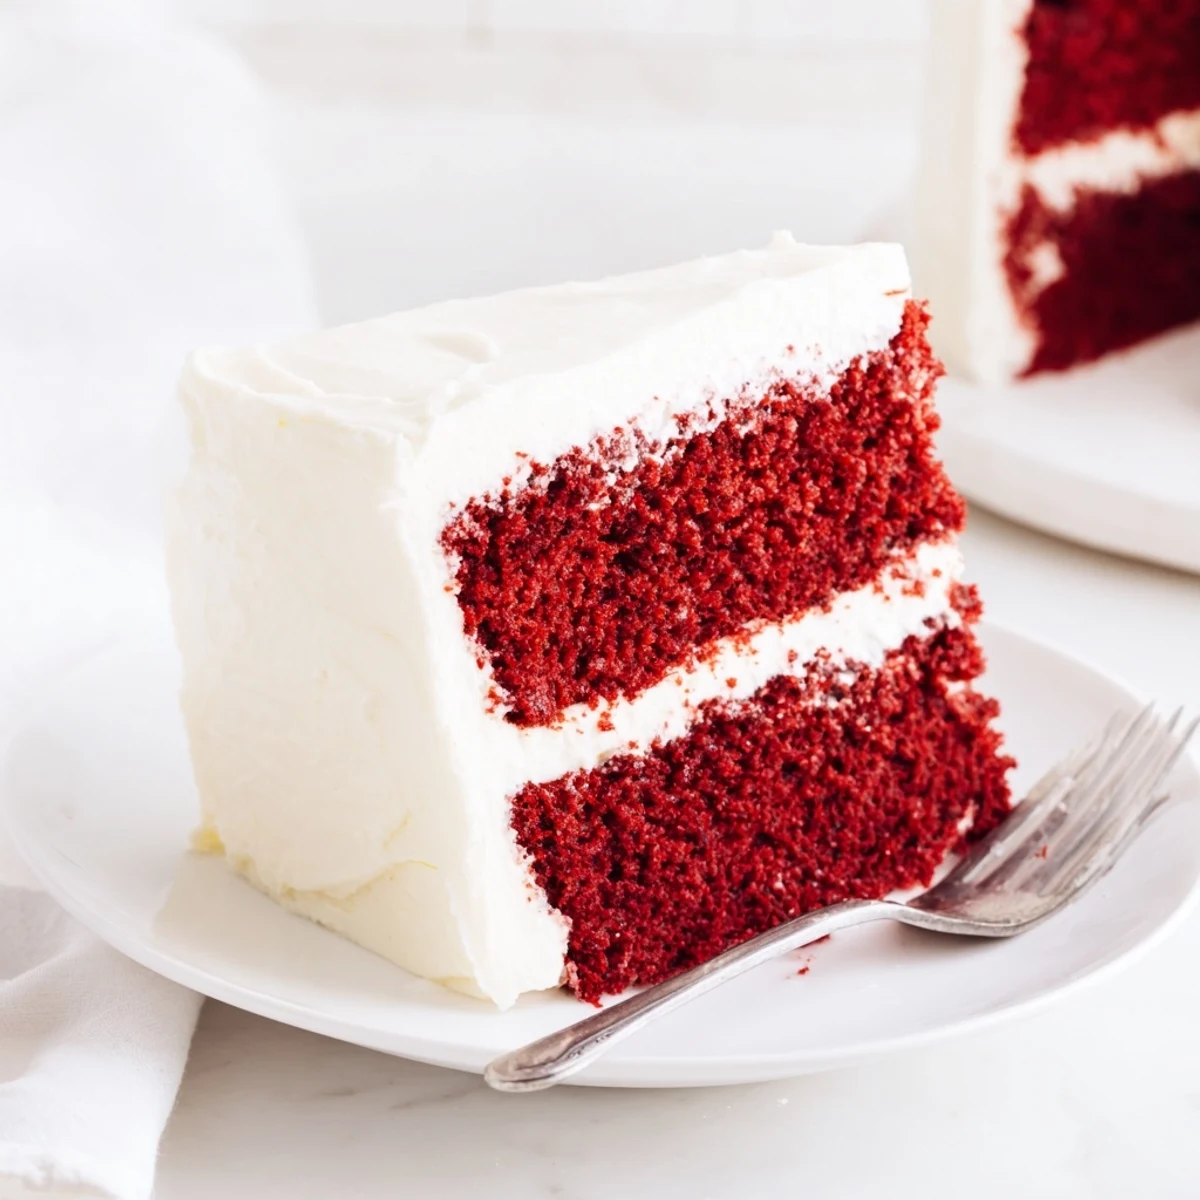
Save This stunning red velvet cake combines subtle cocoa notes with vibrant color and tender texture. The classic American dessert features moist layers made with buttermilk and vegetable oil, creating an irresistibly soft crumb. A rich cream cheese frosting adds the perfect sweet and tangy finish, making this treat ideal for birthdays, weddings, holidays, or any celebration worth remembering.
The straightforward method comes together in just over an hour, requiring basic baking techniques and common pantry ingredients. The signature crimson hue creates dramatic presentation, while the balanced sweetness appeals to both children and adults alike.
My apartment smelled like chocolate and vinegar, which sounds strange but actually means something beautiful is happening. I was attempting red velvet for the first time, nervous about getting that iconic color just right, and watching the batter turn that shocking crimson felt like kitchen magic. The chemical reaction between cocoa and vinegar creates something tender and unlike any other cake, and seeing it work still makes me smile.
I made this for my sisters birthday last winter, and she took one bite and went completely silent. That velvety crumb with the creamy frosting makes people pause mid conversation, forks suspended in the air. Every slice looks so striking against white plates that it feels like serving something from a bakery window.
Ingredients
- All-purpose flour: The structure builder, measure accurately for the perfect tender crumb
- Granulated sugar: Sweetens and helps create that lovely velvety texture
- Baking soda: Reacts with the vinegar for lift and tenderness
- Fine salt: Enhances the chocolate flavor and balances sweetness
- Unsweetened cocoa powder: Provides that subtle chocolate undertone without overpowering
- Vegetable oil: Keeps the cake incredibly moist, unlike butter which can firm up when chilled
- Buttermilk: Adds tang and tenderness, room temperature helps it incorporate properly
- Large eggs: Room temperature eggs emulsify better for a uniform batter
- Red food coloring: Gives that signature crimson hue we all expect
- Vanilla extract: Rounds out all the flavors beautifully
- White vinegar: Reacts with baking soda for extra tenderness and enhances the red color
- Cream cheese: Fully softened is non negotiable for silky smooth frosting
- Unsalted butter: Also softened to room temperature for perfect incorporation
- Powdered sugar: Sifting prevents lumps and ensures silky frosting
Instructions
- Preheat your oven to 350°F (175°C) and prepare the pans:
- Grease two 9-inch round cake pans thoroughly with butter, then dust with flour, tapping out any excess for easy release later.
- Whisk together the dry ingredients:
- Sift flour, sugar, baking soda, salt, and cocoa powder into a medium bowl, breaking up any cocoa lumps for a smooth batter.
- Combine the wet ingredients:
- In a large bowl, whisk oil, buttermilk, eggs, red food coloring, vanilla, and vinegar until the mixture turns a uniform shocking red.
- Mix the batter gently:
- Gradually add dry ingredients to wet, folding just until smooth and no flour streaks remain, being careful not to overmix.
- Bake the layers:
- Divide batter evenly between pans and bake 28 to 30 minutes until a toothpick inserted in the center emerges clean.
- Cool completely before frosting:
- Let cakes rest in pans 10 minutes, then turn onto a wire rack until completely cool to the touch.
- Make the cream cheese frosting:
- Beat softened cream cheese and butter until silky smooth, then gradually sift in powdered sugar, adding vanilla and salt until fluffy.
- Assemble the cake:
- Place one layer on your serving plate, spread frosting generously, top with second layer, then frost the top and sides.
- Chill for clean slices:
- Refrigerate 30 minutes before cutting to get those pristine bakery style slices.
 Save
Save This cake has become my go to for celebrations because it never fails to make people feel special. Something about that dramatic red layer against cream cheese frosting turns an ordinary Tuesday into a occasion worth remembering.
Making It Ahead
You can bake the layers a day ahead, wrap them tightly in plastic, and keep them at room temperature. The frosting actually develops better flavor after sitting overnight in the refrigerator, so feel free to make it in advance and let it come to room temperature before spreading.
Getting The Color Right
Natural red velvet relies on the reaction between cocoa and vinegar for a reddish brown hue, but most of us want that vibrant restaurant style color. Gel food coloring delivers more intense color than liquid, so you need less, and always add it gradually until you reach your desired shade.
Frosting Like A Pro
Apply a thin crumb coat first, chill for 15 minutes, then add your final layer of frosting for that perfectly smooth professional look.
- Run your spatula under hot water for extra smooth frosting surfaces
- Reserve some frosting for piping decorative swirls on top
- Chill the frosted cake briefly before serving to help it hold its shape
 Save
Save There is something joyful about cutting into that red layer and watching peoples faces light up. This cake turns ordinary moments into memories worth savoring.
Recipe FAQs
- → Why does red velvet cake need vinegar?
-
Vinegar reacts with baking soda to help the cake rise and develop a tender crumb. The acidity also enhances the red color from food coloring and balances the sweetness while complementing the cocoa's subtle flavor profile.
- → Can I make red velvet cake ahead of time?
-
Yes, you can bake the layers up to two days in advance. Wrap cooled cakes tightly in plastic wrap and store at room temperature. The frosted cake also keeps well refrigerated for 3-4 days—bring to room temperature before serving for the best texture.
- → What makes red velvet cake different from chocolate cake?
-
Red velvet uses significantly less cocoa than traditional chocolate cake, resulting in a mild chocolate flavor. The signature comes from the combination of buttermilk, vinegar, and oil-based batter, creating a uniquely moist, tender texture with a subtle tang that distinguishes it from standard chocolate varieties.
- → How do I prevent my red velvet cake from drying out?
-
The vegetable oil base naturally keeps this cake moist longer than butter-based versions. Avoid overbaking by checking for doneness a few minutes early. Store properly wrapped at room temperature, or refrigerate frosted portions to maintain freshness.
- → Can I use natural food coloring instead of red dye?
-
Beet juice or pomegranate juice can provide red tint naturally, though results will be less vibrant than gel or liquid food coloring. These alternatives may slightly alter flavor. For the classic bright red appearance without artificial dye, expect a more subtle ruby hue.
- → Why is my cream cheese frosting runny?
-
Softened ingredients are crucial but shouldn't be melting. If your frosting is too thin, chill the bowl for 15-20 minutes then beat again. Adding sifted powdered sugar gradually helps achieve the proper consistency for spreading between layers and coating the exterior smoothly.
